
Quick answer: A motorcycle parts surface finish inspection should begin with an approved finish reference, the correct product and revision, and consistent viewing conditions. Buyers should then check coverage, visible zones, color, gloss, texture, holes, threads and handling marks. Any discrepancy should be photographed and linked to the product, batch or revision before the responsible parties decide whether to approve, clarify, rework or hold the part.
“Good finish” is not a complete inspection requirement. A model-specific rear rack, crash bar, guard or bracket may have a correct shape but still show an appearance problem, incomplete coverage or damage from handling and packing. At the same time, a visually acceptable finish does not prove fitment, strength or long-term performance. These decisions should be reviewed separately.
This guide explains how B2B buyers can make finish review more consistent without inventing coating limits or treating a general visual check as a laboratory test.
Why an Approved Reference Matters More Than “Make It Black”
A finish requirement should identify what the supplier and buyer are comparing. The reference may be an approved physical sample, a written finish description, a buyer-supplied color reference, an artwork file or another agreed document. The important point is that both sides know which reference controls the decision.
Broad wording such as “black,” “shiny,” “matte” or “rust-proof” can create different expectations. A buyer may be describing color, while a supplier may interpret the same word as a coating process or a general appearance preference. Define those items separately:
- Finish process or treatment, when it is already selected.
- Color or visual reference.
- Gloss or texture preference.
- Visible areas and areas that may be hidden after installation.
- Masking expectations around holes, threads and contact surfaces.
The motorcycle parts material and surface finish guide can help buyers prepare the specification before asking for a quotation. Blog 24 has a narrower purpose: checking the finished appearance and recording evidence against that approved requirement.
Confirm the Product, Finish and Viewing Conditions
Before looking closely at a coated or treated part, confirm that the item belongs to the correct product, motorcycle application and revision. Similar brackets or racks may be made for different model versions, and a finish reference for one product should not automatically be used for another.
Record the product or buyer part number, model or application, finish reference, revision and inspection date. If the finish requirement is still open, identify it as an open question rather than treating a sample photo as final approval.
Viewing conditions also influence a visual decision. A buyer and supplier should try to use comparable lighting, a clean part, a reasonable viewing distance and a consistent inspection position. Strong reflections, dust, oil, poor lighting or different camera exposure can make two surfaces appear more different than they are.
These conditions do not create a universal acceptance standard. They simply make the discussion easier to repeat and help both parties understand what the inspection evidence shows.
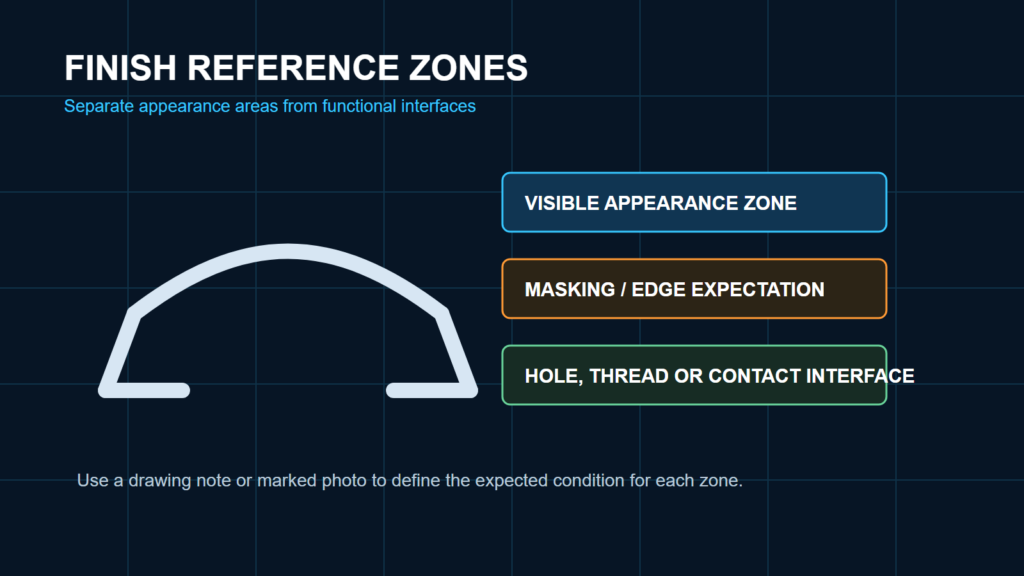
Define Visible Zones, Coverage and Masking Expectations
Not every surface has the same function or visibility. For a tubular motorcycle part, identify the outer tube surfaces, bracket faces, edges, weld areas, mounting holes, threads and contact points that require attention.
Check whether the finish appears continuous across the visible area. Look for exposed base material, uneven coverage, excessive build-up, overspray or areas that were unintentionally masked. Around holes and threads, the inspection should confirm whether the finished condition still matches the approved product requirement and allows the intended interface to remain usable.
Do not assume that every hidden area must look identical to every visible area. Instead, document the expected condition for each zone. A simple marked-up image or drawing note can show which areas are appearance-critical, which are functional interfaces and which are not visible after installation.
For a complete inspection context, use the motorcycle parts quality inspection checklist. It covers finish as one part of a broader review that also includes fitment-related details, hardware, labels, carton condition and shipment evidence.
Separate Color, Gloss, Texture and Surface Defects
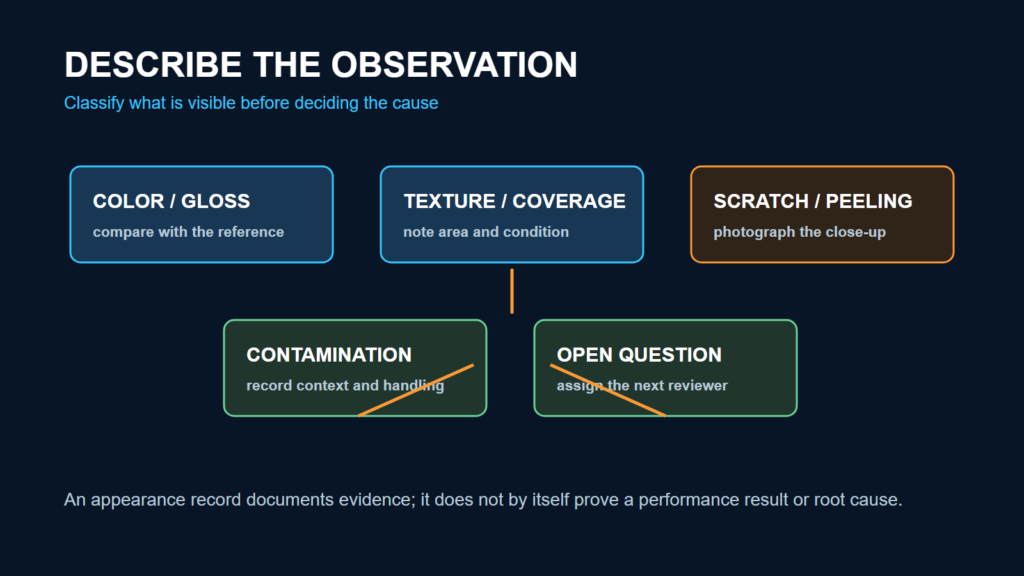
A finish can look different for several reasons, so avoid describing every discrepancy simply as a “color problem.” Compare the following questions separately:
- Color: Does the surface visually match the approved reference under comparable conditions?
- Gloss: Does the surface appear noticeably more reflective or dull than the agreed reference?
- Texture: Is the surface smoother, rougher or more uneven than expected?
- Coverage: Are there visible gaps, thin-looking areas or unwanted exposed material?
- Damage: Are there scratches, chips, peeling, dents or handling marks?
- Contamination: Are there visible particles, stains, oil marks or other foreign material?
If the request is specifically for a motorcycle parts powder coating inspection or motorcycle chrome finish inspection, the process name should still be separated from the acceptance decision. The process label alone does not define the approved color, viewing condition, visible zone or defect disposition.
Keep weld appearance as a separate technical review. A surface finish may make a weld area easier or harder to see, but the finish inspection does not replace the motorcycle parts welding quality review.
Check Interfaces After Finishing
Finish review should include the surfaces that affect assembly, even when they are not the most visible parts of the product. Inspect mounting holes, threads, bracket faces, spacers, collars and other interfaces identified in the approved reference.
The purpose is not to invent a dimensional tolerance. It is to identify whether finishing, masking or handling has created a visible or functional question that requires confirmation. If a hole, thread or contact surface appears blocked, damaged or inconsistent with the approved sample, record the location and ask the responsible reviewer to decide the next step.
For model-specific parts, do not use finish approval as evidence of fitment. Mounting-point alignment, body clearance and installation position remain separate decisions that should be checked against the vehicle reference or approved sample.
Connect Finish Inspection With Handling and Packing
Some finish discrepancies are created after the treatment process. Parts may contact one another, rub against a fixture, be handled without sufficient protection or move inside a carton. For that reason, inspect the finished part together with the inner protection and packing reference when a shipment issue is being investigated.
Record whether the mark was visible before packing, after packing or only at receiving. Photograph the part, the affected area and the relevant packing condition. Do not assume that every scratch proves a coating-process failure.
The wholesale packaging checklist can be used for the wider protection and packing review. Blog 24 should remain focused on the finish condition and the evidence needed to discuss it.
Record Evidence Without Inventing Test Results
A useful finish record should allow another person to understand what was reviewed. Include:
- Product name, part number, model or application.
- Batch, shipment or carton identity when available.
- Finish reference and revision.
- Inspection date and viewing conditions.
- Areas reviewed and areas not accessible.
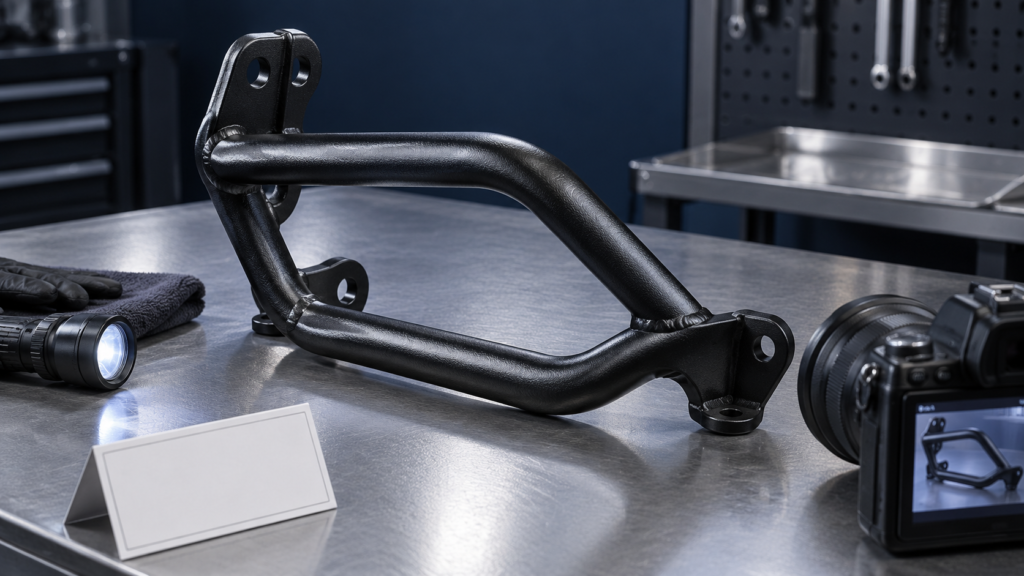
- Clear photos showing the whole part and the close-up condition.
- A description of the observed difference.
- The person responsible for approval or disposition.
Public XCMOTOPARTS buyer guidance connects surface-finish questions with product identity, batch information, labels, carton condition and packing photos. That evidence chain helps separate a finish discrepancy from a model-version, handling or packing issue.
Do not add coating thickness, gloss units, color tolerances, salt-spray hours, adhesion grades or rejection percentages unless the specific requirement and evidence have been confirmed. A visual photo can document appearance; it does not automatically prove a performance result.
Set Sampling and Disposition Ownership
Before production or shipment, clarify what will be reviewed and who makes the decision. The scope may concern a sample, selected pieces, a full shipment review or a specific problem area. The supplier and buyer should use the same product and finish reference when discussing the result.
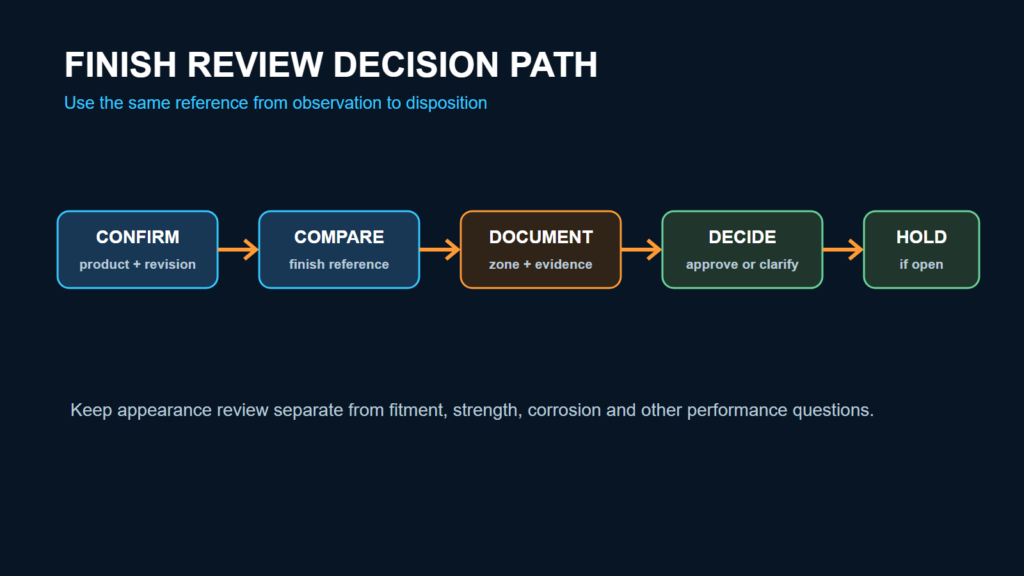
When the condition is unclear, use a controlled decision path:
- Confirm the product and revision.
- Confirm the finish reference.
- Repeat the observation under comparable conditions.
- Capture photos and identify the affected zone.
- Classify the issue as appearance, coverage, interface, handling or another open question.
- Assign the decision to the agreed buyer or supplier reviewer.
- Record approval, clarification, rework review or hold status.
For repeated orders, keep the accepted finish reference connected to the current product revision. The batch consistency guide is relevant when a buyer needs to compare appearance across batches without silently changing the reference.
Motorcycle Parts Finish-Inspection Checklist
- Correct product, model and revision confirmed.
- Approved finish reference identified.
- Viewing and handling conditions recorded.
- Visible zones and masking expectations defined.
- Coverage checked on tubes, brackets and edges.
- Holes, threads and contact surfaces reviewed.
- Color, gloss and texture compared separately.
- Scratches, peeling, contamination and coverage gaps photographed.
- Handling and packing condition considered.
- Sampling scope and disposition owner recorded.
- Decision linked to product, batch and revision information.
Frequently Asked Questions
What should a buyer approve before motorcycle parts surface finish inspection?
Approve or identify the product, model or application, current revision and finish reference first. The reference may be a physical sample, written requirement, artwork or another agreed source. Without this starting point, the inspection may compare the part with an unclear or outdated expectation.
Is a product photo enough to approve color and gloss?
A photo can support a discussion, but it may be affected by lighting, camera settings, screen display and surrounding colors. Use a photo as supporting evidence unless both parties have agreed that it is the controlling reference. A physical sample or written reference may be more useful for repeat comparison.
How should buyers separate visible finish defects from performance questions?
Record what can actually be seen, such as a scratch, peeling area, contamination or coverage gap. Then identify any separate performance question, such as adhesion or corrosion resistance, as a requirement that needs its own confirmed method and evidence. Do not treat an appearance photo as proof of a test result.
Should holes, threads and mounting interfaces be checked after finishing?
Yes. Review the interfaces identified in the approved drawing, sample or product reference. The purpose is to confirm that finishing, masking or handling has not created an open assembly question. This check does not replace a complete fitment or dimensional review.
What evidence should a supplier provide for a finish discrepancy?
Useful evidence includes the product identity, model or revision, batch or carton information when available, the finish reference, viewing conditions, whole-part photos and close-ups of the affected area. Packing photos can also help determine whether the condition appeared during handling or transit.
When should a buyer hold a shipment for finish review?
Hold the affected product or carton when the finish condition cannot be compared confidently with the approved reference, when a visible issue may affect a functional interface, or when the responsible reviewer has not decided whether the condition is acceptable. Record the reason and evidence rather than using a general “bad finish” description.
Send a Reviewable Finish Requirement
For a clearer quotation or pre-shipment discussion, send the product and application, finish reference, visible-zone expectations, masking notes, packing requirements and any open questions. If private-label color or artwork is involved, keep the visual approval connected to the current product revision. The OEM motorcycle parts branding requirements guide can help separate branding decisions from the physical finish inspection.
For model-specific rear racks, crash bars, guards and other tubular motorcycle parts, submit the requirement through the B2B quote form. A clear reference and evidence path gives both sides a more practical basis for reviewing the finished part.