
Quick answer: A motorcycle-parts installation guide should identify the exact product and application, show the supplied hardware and orientation, explain the installation sequence, separate confirmed specifications from open questions, and carry a clear revision status. Buyers should validate the guide against the approved drawing, sample, kit and fitment reference before sending it to installers or customers.
A product photo and a familiar model name are not enough to create usable instructions. A rack, crash bar, guard or bracket may depend on a particular model version, mounting point, spacer or fastener. Incomplete instructions create installation questions and after-sales work. This guide helps B2B teams define what they need without inventing torque values, safety claims or universal fitment.
Identify the Exact Product and Application
Start with the item that the instructions are meant to explain. The manual, product listing, carton label and hardware pack should point to the same saleable product or kit. At minimum, ask the supplier and internal product team to align:
- Product name, buyer SKU or part reference.
- Motorcycle make, model, year and market version where these affect fitment.
- Kit scope, including brackets, spacers, fasteners and other supplied items.
- Current drawing, sample, BOM or other approved reference, plus instruction revision and language.
Do not let a broad description such as “motorcycle luggage carrier” stand in for the application record. Similar products can use different mounting interfaces. See the motorcycle parts catalog data checklist for a way to separate identity, application and kit information.
Define Tools, Safety Boundaries and Prerequisites
A useful instruction sheet tells the installer what must be ready before the first step: the correct motorcycle configuration, supplied hardware, required tools, a clean work area and access to the relevant mounting points. The exact tool list should come from the approved product and installation review, not a generic template.
Safety language also needs a clear boundary. Distinguish an installation warning, a vehicle-manufacturer requirement and a performance claim. If a warning, tool, torque value or operating limit is not confirmed, keep it as a technical-review question.
Instructions should also state what the guide does not cover. An assembly guide should not imply that the accessory changes the motorcycle’s load rating or guarantees safe use under every condition. Vehicle-specific limits must come from the responsible technical source.
Map Hardware, Spacers and Left/Right Orientation
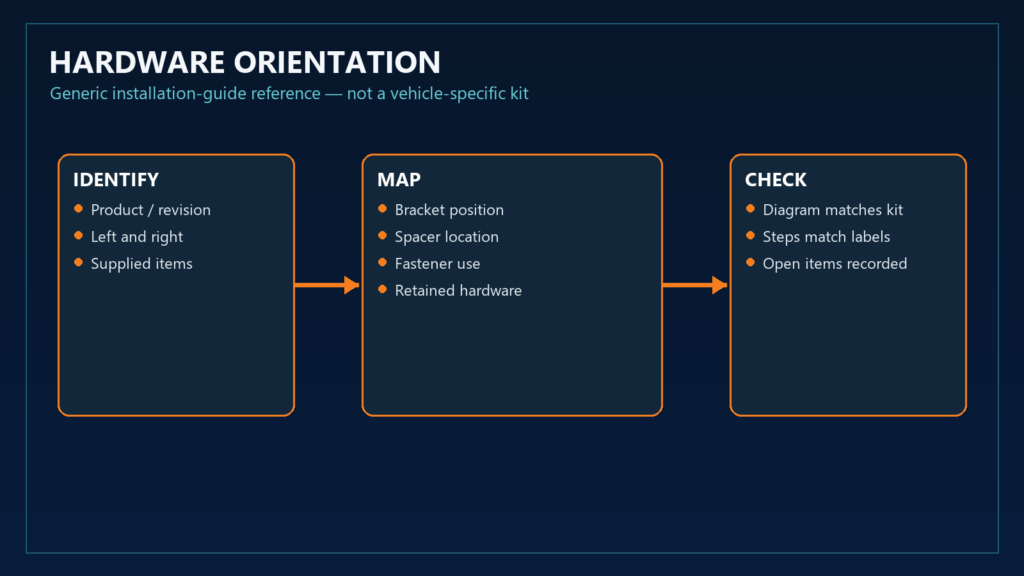
Hardware identification is one of the most practical parts of an installation guide. A buyer should be able to compare the diagram with the actual bags and components before installation.
Ask the supplier to make clear, where applicable:
- Which brackets or tubes are left-hand and right-hand.
- Where each spacer, collar, washer and fastener is used.
- Which parts are supplied as a pair, optional item or replacement component.
- Whether original vehicle hardware is retained, replaced or moved.
A labelled exploded view can reduce confusion, but labels must match the written steps and packing list. If hardware is missing or mismatched, the defect claim checklist explains what evidence to preserve; it does not replace a complete kit check.
Write a Numbered Sequence With Checkpoints
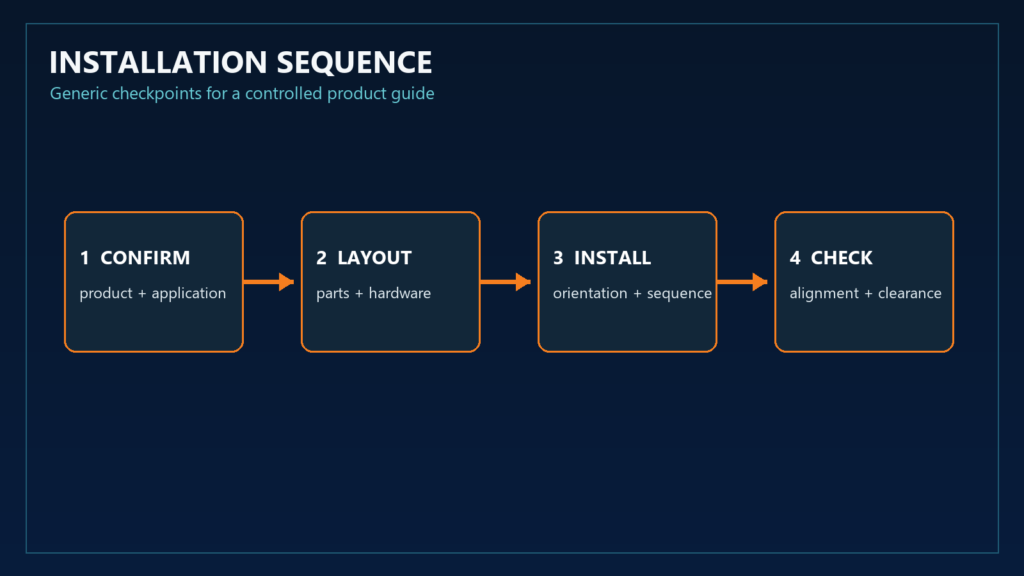
Installation instructions are easier to follow when each action has one clear purpose and the sequence reflects the physical assembly. Avoid combining several fasteners, orientations and checks in one paragraph. A numbered sequence can be structured around:
- Confirm the motorcycle and product version before opening the kit.
- Lay out the supplied components and compare them with the hardware diagram.
- Prepare the installation area and identify the relevant mounting points.
- Place brackets, spacers or supports in the stated orientation.
- Install fasteners in the stated sequence, leaving any required adjustment step clear.
- Check alignment, clearance and contact points before final tightening.
- Complete the final visual and hardware check described by the approved reference.
Each step should say what the installer can observe before continuing: correct bracket position, left/right orientation and spacer presence. The guide should not ask the installer to force a part into place or silently modify a mounting interface. If the sample requires clarification, resolve it before distribution.
Separate Fitment Notes From Product Claims
Fitment notes should describe the application that was actually reviewed: model reference, mounting points, clearances, retained accessories or other installation conditions. They should not turn a single sample review into a claim that the part fits every version of a model.
Use the relevant rear-rack fitment guide or crash-bar fitment guide when model-specific mounting and sample approval are the main question. Blog 26 has a different role: it explains how the approved fitment information should be turned into usable product instructions.
Keep performance, legal and safety claims separate from assembly directions. An installation manual should not promise crash protection, load capacity, durability, certification or guaranteed fitment unless the responsible party has approved the exact wording and evidence.
Assign Ownership for Torque and Technical Specifications
Torque values and other technical specifications should have an identifiable source. A buyer should ask who owns the value, which product or vehicle reference it applies to, and how a revision would affect it. Do not copy a number from another model, a general fastener chart or an online discussion and present it as the supplier’s approved instruction.
If a value is not available for release, the guide should use a controlled technical-review process rather than a guess. The same principle applies to thread-locking compounds, re-tightening intervals, clearance limits and other details that may affect installation. The article can explain what information a buyer should request without asserting a universal value.
Use Photos and Diagrams Without Exposing the Wrong Reference
Images should solve a specific instruction problem. A close-up can show bracket orientation, an overhead view the hardware layout and a vehicle-context photo the mounting area. Each image should match the product revision.
Check that diagrams do not show a different model, an unapproved accessory or hardware that is not supplied. Remove customer names, private labels, order numbers and other sensitive information unless the buyer has approved their use. An editorial diagram may explain a general concept, but it must not be presented as a photograph of an actual installation or as evidence of a completed factory validation.
Control Language, File Format and Manual Revisions
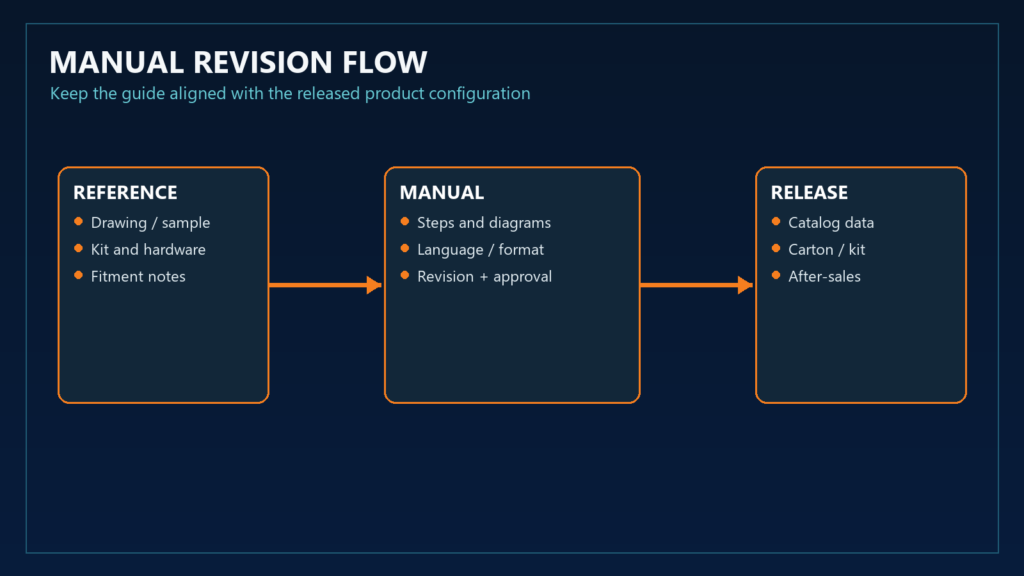
For private-label programs, instructions may need a buyer-approved logo, file format, language or packaging reference. Record those decisions separately from the technical content. The product, carton, catalog listing and manual should point to the same current revision.
When a bracket, hardware pack, finish, model application or sequence changes, review the manual as well. Give it a visible revision and approval status, prevent the old version from being distributed with the new product, and record the first order or batch using the revised guide. See the supplier change-control guide for connecting a change with evidence and its effective batch.
Validate the Guide Before Release
Before publishing or packing the instructions, compare the document with the approved product references:
- Product, vehicle application and order match.
- Pictured parts, hardware names and quantities match the kit.
- Left/right orientation and spacer positions are unambiguous.
- The sequence reflects the reviewed installation and checkpoints.
- Torque and safety details are sourced and approved.
- Images, language, file name, revision and effective batch are aligned.
- The guide avoids claims that the evidence does not support.
A guide that fails one of these checks should be clarified or held before distribution. The goal is to give the installer the right information for the right part and expose open questions before they become after-sales issues.
Frequently Asked Questions
What should a motorcycle-parts installation guide include?
It should identify the product and application, list supplied items, show hardware and orientation, provide numbered steps and checkpoints, state relevant fitment notes, assign technical-specification ownership and show its revision. Content should match the approved product and kit.
Can a product photo confirm installation fitment?
No. It can show general shape and context, but not model-year, market-version, mounting-point alignment or clearance. Check fitment against the identified vehicle and an appropriate drawing, sample or installation reference.
How should a buyer identify supplied hardware and spacers?
Use a labelled diagram that matches the packing list and written steps. Identify left/right parts, spacer locations, fastener use and retained vehicle hardware. If the diagram and kit disagree, hold the guide and resolve the reference.
Should installation instructions include torque values?
Only when the value comes from the responsible technical source and applies to the exact product and installation. Do not copy an unverified value from another model or generic source; resolve open torque questions before release.
How can a private-label buyer control manual revisions?
Give the manual a clear file name, revision, language and approval status, then link it to the product, kit, packaging and effective order or batch. Review the manual whenever an installation-related part changes.
What should a buyer do when the instructions do not match the supplied parts?
Stop distribution or installation of the affected scope, preserve the product, hardware and packaging references, record the discrepancy and request technical clarification. Do not silently edit the manual or force the parts to match it.
Send a Reviewable Installation-Instruction Requirement
Before quotation or manual preparation, send the product reference, motorcycle make/model/year and market version, drawing or sample, fitment photos, hardware list, packaging scope, required language or format and open technical questions. This gives both sides a basis for deciding what the guide must contain.
For a rear rack, crash bar, guard or other tubular motorcycle-parts project, use the B2B quote form to submit the application and reference package. A controlled installation guide should follow the approved product—it should not be asked to replace the product review itself.